

A Guide to Storing Camping Gear for Outdoor Enthusiasts

Camping brings joy, adventure, and a chance to reconnect with nature, but storing all that gear can feel overwhelming. An organized system lets you grab what you need for your next trip without wasting time. Thoughtful storage also protects your equipment, ensuring it lasts through many adventures. Learn excellent tips and tricks as you explore our guide to storing camping gear for outdoor enthusiasts!
Clean First, Then Store
Dirt and moisture create the perfect environment for mold, rust, and bad odors. These elements can weaken fabrics, corrode metals, and attract pests. Cleaning each item right after a trip keeps everything in good condition and ready for use.
Tents and sleeping bags require gentle care to maintain their durability. Shake out tent bodies and rainflies to remove sand, dirt, or leaves. Spot clean with a sponge, water, and mild soap. Follow the care labels for sleeping bags and outdoor clothing. Use front-loading washers or handwash to prevent damage to fabrics and finishes. Air dry whenever possible, as dryers can compress insulation or weaken waterproof coatings.
Camping boots and shoes experience mud, dust, and wet conditions. Wipe them down after every trip with a damp cloth and specialized boot cleaner. Remove insoles and loosen laces to allow proper drying. Stuff boots with newspaper to absorb moisture. Avoid leaving them in direct sunlight for drying, as excessive heat damages materials.
Double-check that everything is completely dry before storing. Damp fabrics or materials lead to mildew or musty smells. Keep breathable storage bags for fabrics, such as sleeping bags and tents, instead of compressing them into tight sacks.
Use Durable Bins for Bulkier Items
Durable storage bins protect items from moisture, dust, and pests, making them ideal for bulky items. Rigid materials prevent bins from buckling when you stack them, giving you a tidy way to organize limited storage areas. Bins also come in a variety of sizes, so you can easily customize your storage setup.
Designating Specific Gear Categories
Organizing bins by category simplifies everything. Assign one bin to tents and tarps, another for kitchen gear, and one for sleeping arrangements. Include smaller storage bags or containers inside bins to group items further if needed.
For instance, bundle tent poles, guylines, and stakes in a fabric pouch inside the tent bin for quick access. Categorizing your gear helps eliminate clutter and improves efficiency when packing and unpacking gear.
Protecting Gear Inside the Bins
Don’t forget about internal protection for delicate items. Use soft cloths or bubble wrap to cushion fragile gear, such as lanterns or small electronic components. Airtight bins provide extra security against humidity during extended storage. Periodically inspect stored gear for damage or pests to ensure everything stays in good shape.

Store Small Items in Modular Compartments
Flashlights, batteries, carabiners, and first-aid kits serve specific purposes that can make or break your outdoor experience. It can be frustrating to locate these items when they’re scattered across drawers and bags. However, proper storage ensures they remain accessible and organized.
Modular compartments offer flexible ways to sort small gear into manageable groups. Use stackable tackle boxes, drawer-style organizers, or zippered mesh bags to keep everything contained. Many options include dividers or sections allowing you to separate items. For instance, multi-tools or repair kits stay in one space, while matchboxes and fire-starting equipment fit into another compartment.
Organizing Items by Category
Split small items into categories for easier packing and retrieval. Group lighting gear into one container, such as headlamps, flashlights, and extra bulbs. Dedicate another section for navigation tools, such as compasses, whistles, or maps. Arrange space for bandages, ointments, pain relievers, and other first-aid supplies.
Long-Term Maintenance of Small Gear
Take time after every camping trip to empty and clean your small compartments. Shake out dust or debris, and check for damaged or expired batteries or first-aid supplies. Refill missing items right away so you won’t forget them during the next outing. With consistent attention, your small-item organization stays effective and hassle-free.
Organize Food and Cooking Gear Separately
Food residue and fuel leaks can cause odors or attract pests. You wouldn’t want a pack of marshmallows ruined by spilled cooking oil. Isolating food and cooking items prevents cross-contamination and organizes everything into a single, streamlined system.
Airtight containers extend the freshness of stored food and keep pests away. Hard-shell containers or durable resealable bags work well for dry goods, such as pasta, trail mix, or powdered drinks. Vacuum-seal bags reduce air exposure and take up less space, which is useful for long-term storage between trips. Label containers with contents and expiration dates.
Group cookware and utensils to avoid a chaotic packing process. Dedicate one bin or shelf to pots, pans, and camp stoves, and assign separate compartments for utensils, cutting boards, and cleaning supplies. Nest pots and pans to save space and use utensil rolls or organizers to keep forks, knives, and spoons in order. Adding zippered pouches for smaller tools, such as can openers or camp knives, keeps your setup tidy.
Creating a Grab-and-Go Cooking Kit
A pre-packed cooking kit reduces prep time for short camping trips. Stock a box or bag with essentials such as dish soap, reusable cloths, sponges, and oil or seasoning packets. Include lightweight items, such as collapsible bowls or fuel canisters to maintain portability. This kit lets you grab necessities for cooking without repacking every single time. Modular add-ons also make it easy to tailor kits for different trips, allowing flexibility between solo outings or larger group expeditions.
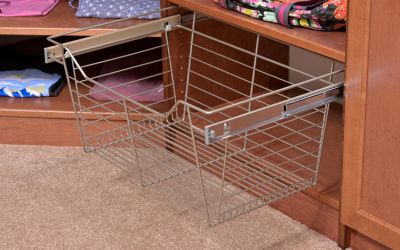
Creating a Custom Entryway Closet for Camping Gear
Creating a custom entryway closet is an essential part of this guide to storing camping gear for outdoor enthusiasts. It’s no secret that an entryway can easily become a dumping ground for shoes, coats, and outdoor equipment, leading to disorganization.
Fortunately, a custom wooden closet system transforms this frequently used space into an efficient storage zone. You consolidate jackets, boots, dry accessories, and more. This system prevents camping gear from spilling into living areas and ensures everything remains in one place.
Defining Zones To Simplify Packing
Divide the closet into zones to streamline packing for your next trip. Dedicate one section to outerwear and accessories, with hooks and shelves for jackets, hats, and gloves. Another section could house smaller equipment, such as repair kits and flashlights in bins or pouches. Footwear can sit on the bottom shelf or in a separate shoe rack. Overall, this level of organization also makes repacking after a trip feel less chaotic.
Maintaining Your Custom Closet System
Periodically review closet contents, rearrange items as seasons change, and clean dust or outdoor debris from shelves and bins. Rotate your jackets, boots, and other common-use items to the front and move lesser-used seasonal gear further back. This ongoing effort ensures your closet stays organized long-term and provides hassle-free access to your camping gear.